The brake light switch is an essential element of your braking system. It illuminates your rear brake lights and alerts other drivers when you’re slowing down.
When your brake light switch malfunctions, this can pose a serious safety risk and compromise both ABS and cruise control systems.
📢Read also: Brake Light Bulb Replacement For Your 2013 Mercedes ML350
Wiring
If your rear brake light switch doesn’t function, your bike could have an electrical short. This is likely because the running light circuit is providing power to the brake light switch when open.
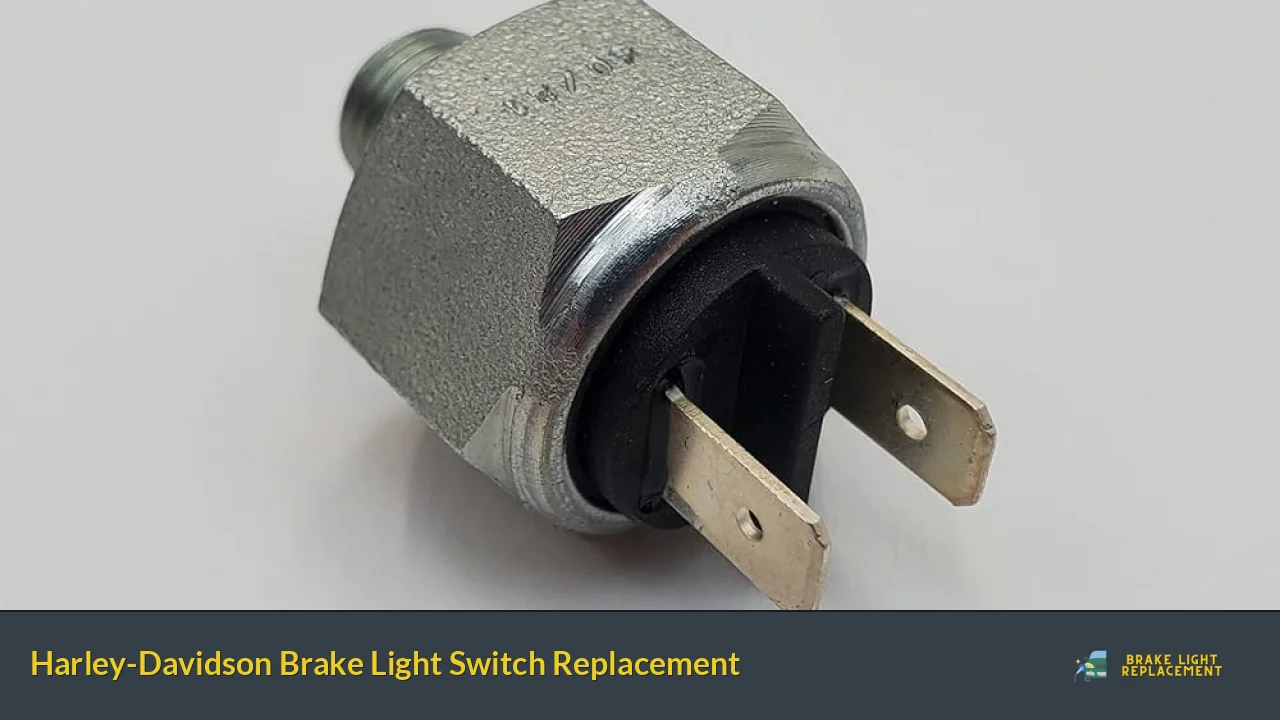
Replacing the brake light switch on a Harley is usually easy. Usually, one wire runs from the switch to the brake light and another powers both front and rear switches.
This wiring, usually orange with a white tracer, supplies 12 volts to the switch when squeezed.
Before replacing the switch, it is recommended to strip away its wiring, leaving 1/4 inch bare wire. Cut two 1-inch long pieces of shrink tubing and slide them over both the wires from the switch and those in the original harness. Tighten any solder joints with heat shrink and secure with some shims for extra security.
⚡️Another article: 2012 Volvo S60 Third Brake Light Replacement
Disassembly
Modern Harley-Davidson motorcycles depend on hydraulic brakes to bring them to a stop. The brake light switch is an integral component of this process and when it fails, accidents may occur.
The front brake light switch is located on the right-hand side of the handlebar control. To remove it, use a Torx T-27 driver to unscrew two screws that secure it to the front master cylinder housing.
To replace a brake light switch, carefully strip away any original wires from your old switch and install a new one. Be sure to note the size and shape of your old switch so you can make secure soldered connections with your shiny new one. The most challenging part of this job may be taking out the shim that holds the brake lever contact tab away from the switch; to make things simpler, place a strip of cardboard between them for easier removal.
Replacement
A malfunctioning brake light switch can lead to accidents. It plays an integral role in your braking system and has an impact on other components such as ABS and cruise control settings.
Harley Davidson is recalling over 250,000 touring, CVO touring and trike models due to a potential issue with their rear brake light switches being exposed to excessive heat from the exhaust system. This could cause the switch not to activate or leak brake fluid, negatively affecting rear brake performance.
Replacing a brake switch on most models is simple enough with the right tools and instructions. Depending on your year and model, you may need to refer to your service manual for guidance.
Installation
Modern Harley-Davidson motorcycles rely on hydraulic brakes to bring them to a sudden stop. When these components fail, the results can be devastating.
Fortunately, it’s not always necessary to visit the shop to fix your front brake light switch. The process is relatively straightforward and can easily be completed by a DIY enthusiast.
📢Read also: 2003 Cadillac Escalade Third Brake Light Replacement
The initial step in diagnosing a switch problem is critical. This necessitates taking an in-depth look at both the switch itself and any wiring that connects to it.
Furthermore, make sure the switch is in its proper position and all wires are securely attached. If not, then the switch could be malfunctioning and require replacement.
For this job, you’ll need a set of tools. A torque wrench and hex driver are both recommended for taking out the switch’s mounting screw. Additionally, some pliers may be necessary when disassembling the switch.