The brake light switch is a crucial component of a vehicle’s lighting system, responsible for activating the brake lights when the brake pedal is pressed. Understanding its location and function is essential for vehicle maintenance and safety. Typically, the brake light switch is situated near the top of the brake pedal assembly, making it relatively easy to access for inspection or replacement.
When you press the brake pedal, the switch closes an electrical circuit that turns on the brake lights, alerting drivers behind you that you are slowing down or stopping. If this switch fails, it can lead to serious safety issues, such as brake lights not illuminating or remaining constantly on. This article will delve into the specifics of where to find the brake light switch, how it functions, and what to do if you experience problems with it.
| Function | Importance |
|---|---|
| Activates brake lights | Alerts other drivers of braking |
| Signals vehicle systems | Enables cruise control and gear shifting |
Location of the Brake Light Switch
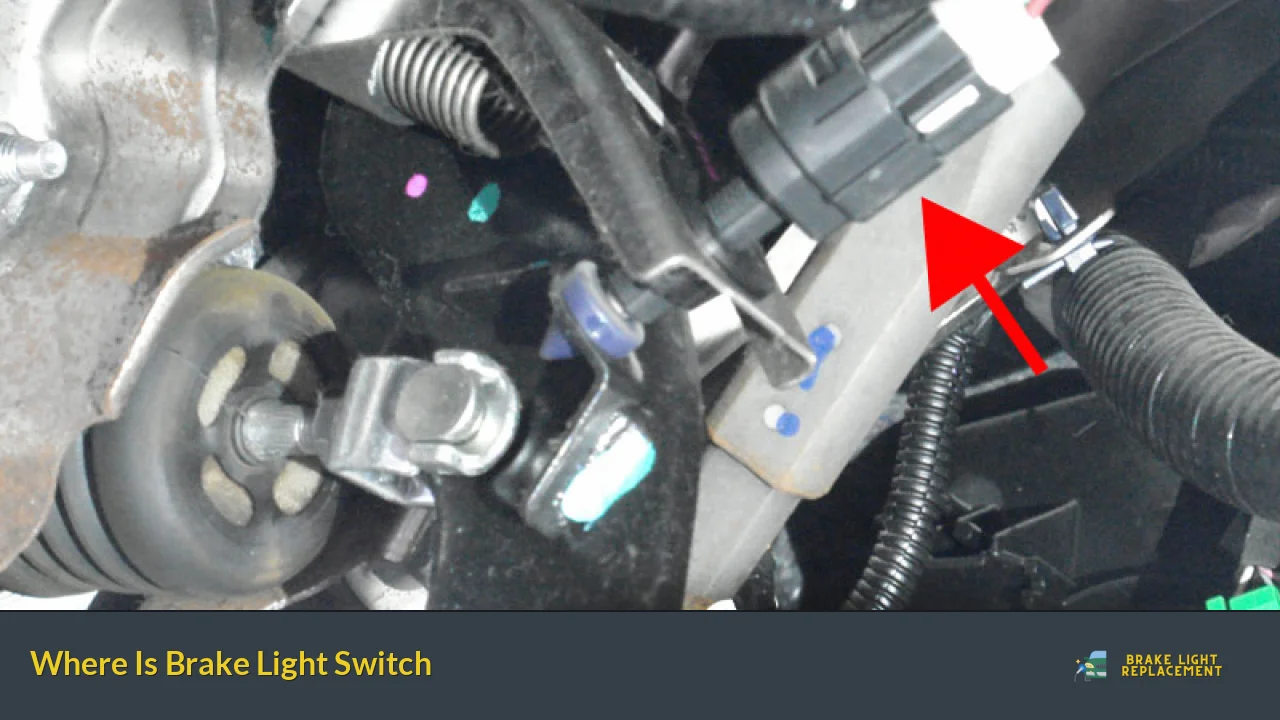
The brake light switch is generally located above the brake pedal in most vehicles. This position allows it to be easily activated when the pedal is pressed. The exact placement may vary slightly depending on the make and model of your vehicle, but here are some common locations:
- Directly above the brake pedal assembly
- Near the pivot point of the brake pedal lever
- Attached to a bracket that holds it in place
In many vehicles, you can find the switch by looking under the dashboard, close to where your right foot would rest while driving. It is typically mounted on or near the top of the brake pedal assembly.
Importance of Brake Light Switch Functionality
The functionality of the brake light switch is vital for several reasons:
- Safety: The primary role of this switch is to ensure that your brake lights illuminate when you apply pressure to the brake pedal. If this switch fails and your brake lights do not activate, other drivers may not be aware that you are stopping, which can lead to accidents.
- Cruise Control: Many vehicles use the brake light switch as a signal to disengage cruise control. If the switch is malfunctioning, it may prevent cruise control from turning off when you press the brakes.
- Gear Shifting: In automatic transmission vehicles, a functioning brake light switch allows for smooth gear shifting. If this switch fails, it may cause issues when trying to shift out of park or between other gears.
A malfunctioning brake light switch can result in various symptoms that indicate a need for inspection or replacement.
Symptoms of a Faulty Brake Light Switch
Recognizing the symptoms of a faulty brake light switch can help you address issues before they escalate. Common signs include:
- Brake lights do not illuminate when pressing the pedal
- Brake lights remain on continuously
- Cruise control does not engage or disengage properly
- Difficulty shifting gears in automatic vehicles
If you notice any of these symptoms, it’s crucial to investigate further as they can indicate that your brake light switch needs attention.
How to Access and Replace Brake Light Switch
Accessing and replacing a faulty brake light switch can often be done at home with some basic tools. Here’s a step-by-step guide:
1. Disconnect Battery: Always start by disconnecting your vehicle’s battery to prevent electrical shorts.
2. Remove Paneling: Depending on your vehicle model, you may need to remove lower dash paneling or covers to access the brake light switch.
3. Locate Switch: Identify the brake light switch above the brake pedal. It may be secured with clips or screws.
4. Disconnect Wiring Harness: Carefully unplug any wiring harness connected to the switch.
5. Remove Old Switch: Depending on its mounting style, either unclip or unscrew the old switch from its bracket.
6. Install New Switch: Position the new switch in place and secure it as necessary.
7. Reconnect Wiring: Attach any wiring harnesses back onto the new switch.
8. Reattach Paneling: Replace any panels or covers removed earlier.
9. Reconnect Battery: Finally, reconnect your battery and test your new brake light switch by pressing down on the brake pedal and checking if the lights illuminate correctly.
This process typically requires minimal mechanical skills and can save on repair costs if done independently.
Testing Your Brake Light Switch
After replacing your brake light switch, it’s essential to test its functionality:
- Press down on your brake pedal while observing if both rear brake lights illuminate.
- Ensure that releasing the pedal turns off both lights.
- Test cruise control functionality by engaging it while driving and pressing down on the brakes.
- Check if gear shifting operates smoothly without any hindrance when pressing down on the brakes.
If all tests pass successfully, your new brake light switch should be functioning correctly.
FAQs About Brake Light Switch
- Where is my brake light switch located?
The brake light switch is typically located above the brake pedal assembly. - What are common symptoms of a bad brake light switch?
Common symptoms include non-functioning brake lights or lights that stay on continuously. - Can I replace my own brake light switch?
Yes, replacing a brake light switch is often manageable for DIY enthusiasts with basic tools. - How much does it cost to replace a brake light switch?
The cost for parts typically ranges from $10 to $70 depending on your vehicle. - Why should I disconnect my battery before replacing?
Disconnecting your battery prevents electrical shorts during replacement.
In conclusion, knowing where your brake light switch is located and how it operates is essential for maintaining vehicle safety. Regular checks and timely replacements can prevent dangerous situations on the road caused by malfunctioning lighting systems.