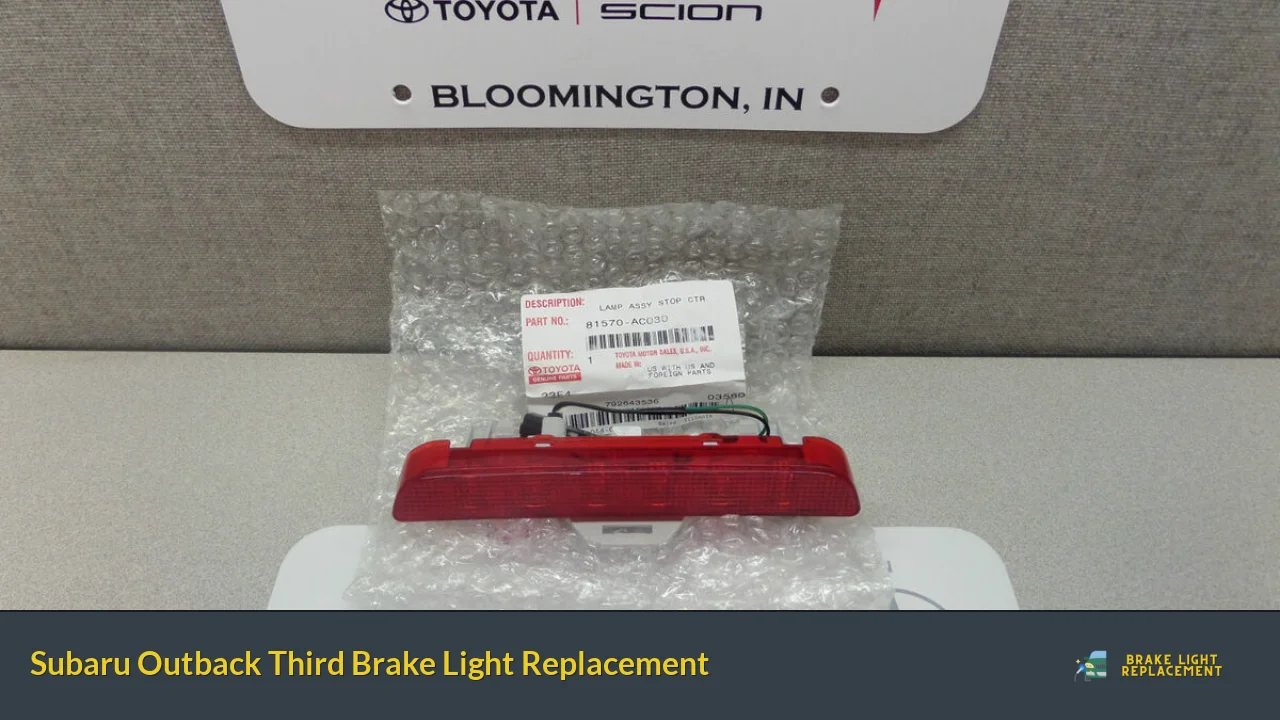
Are you tired of driving around with a malfunctioning third brake light on your Toyota Avalon? It’s time to take action and replace that faulty brake light to ensure your safety on the road. In this article, we will guide you through the process of replacing the third brake light on your Toyota Avalon, step by step.
Firstly, let’s talk about why the third brake light is so important. This high-mounted brake light, also known as the center brake light, plays a crucial role in alerting other drivers when you’re applying the brakes. It provides an additional signal to those behind you, increasing their awareness and reducing the chances of rear-end collisions. So, if your third brake light is not working, it’s essential to fix it promptly.
To begin the replacement process, you’ll need a few tools: a screwdriver and a new third brake light assembly. You can find compatible replacements at your local auto parts store or online. Once you have the necessary tools and the replacement part, follow these simple steps:
-
Start by opening the trunk of your Toyota Avalon. Locate the access panel on the inside of the trunk lid, directly behind the third brake light.
-
Remove the screws or bolts securing the access panel using a screwdriver. Carefully set aside the screws or bolts in a safe place.

Gently pull the access panel away to reveal the wiring harness connected to the back of the third brake light assembly.
-
Disconnect the wiring harness by pressing the release tab or removing the connector clip, depending on your Avalon model.
-
With the wiring harness disconnected, you can now remove the old third brake light assembly. Unscrew any retaining screws or bolts and carefully detach the assembly from the trunk lid.
-
Take your new third brake light assembly and align it with the holes on the trunk lid. Secure it in place by tightening the screws or bolts.
-
Reconnect the wiring harness to the back of the new assembly. Make sure it clicks into place or locks securely.
-
Once everything is securely in position, replace the access panel by aligning it with the holes and tightening the screws or bolts.
Congratulations! You have successfully replaced the third brake light on your Toyota Avalon. Now, when you hit the brakes, your new brake light will shine brightly, ensuring that other drivers can see you stopping. Remember, maintaining all aspects of your vehicle’s lighting system is crucial for your safety and the safety of those around you. So, don’t delay—replace that faulty third brake light today!
Revitalize Your Ride: Simple Steps for Toyota Avalon Third Brake Light Replacement
Are you tired of the dull and outdated look of your Toyota Avalon’s third brake light? If so, it’s time to revitalize your ride with a simple and straightforward brake light replacement. In this article, we’ll guide you through the steps to give your Avalon a fresh and modern appearance that will turn heads on the road.
First things first, let’s gather the necessary tools for the job. You’ll need a flathead screwdriver, a new Toyota Avalon third brake light assembly, and a clean cloth. Once you have everything ready, let’s dive into the replacement process.
Step 1: Start by opening the trunk of your Toyota Avalon. Locate the third brake light cover inside the trunk. It’s usually attached with a few screws or clips.
Step 2: Carefully remove the screws or disengage the clips holding the cover in place using a flathead screwdriver. Gently pry the cover off, being cautious not to damage it.
Step 3: With the cover removed, you’ll see the wiring harness connected to the brake light assembly. Disconnect the wiring harness by pressing the release tab and gently pulling the connector apart.
Step 4: Once the wiring harness is disconnected, you can now remove the old brake light assembly. Depending on the model year of your Avalon, it may be held in place by screws or tabs. Unscrew the assembly or release the tabs, and carefully take out the old brake light.
Step 5: Before installing the new brake light assembly, make sure to clean the area where the old one was seated. Use a clean cloth to wipe away any dust or debris.
Step 6: Now, it’s time to install the new Toyota Avalon third brake light assembly. Align the assembly with the vacant slot and secure it in place using screws or by inserting tabs until it clicks.
Step 7: Reconnect the wiring harness to the new brake light assembly. Ensure a secure connection by pressing the two ends together until you hear a click.
Congratulations! You’ve successfully revitalized your ride by replacing the third brake light on your Toyota Avalon. Now, close the trunk and admire the refreshed look of your vehicle. Enjoy the enhanced safety and style as you hit the road with confidence.
Illuminate Your Safety: How to Replace the Third Brake Light on a Toyota Avalon
Are you tired of driving around with a faulty third brake light on your Toyota Avalon? Don’t worry, because in this article, we’ll show you exactly how to replace it and illuminate your safety! The third brake light, also known as the center high mount stop lamp (CHMSL), plays a crucial role in alerting other drivers when you’re braking. It’s essential for maintaining road safety, so let’s get started.
Firstly, gather the necessary tools for the job. You’ll need a screwdriver, a replacement bulb (check your vehicle’s manual for the correct type), and possibly a ladder or step stool, depending on your car’s height. Once you’re ready, follow these simple steps:
Step 1: Locate the third brake light housing. In most Toyota Avalon models, it’s positioned at the top center of the rear windshield, inside the trunk.
Step 2: Carefully remove the housing cover. It’s usually secured by screws or plastic clips. Use the screwdriver to unscrew the screws or gently pry open the clips. Be cautious not to damage the housing or the surrounding area.
Step 3: Once the cover is off, you’ll have access to the bulb socket. Twist it counterclockwise and pull it out. Take note of the bulb’s orientation to ensure proper installation later.
Step 4: Remove the old bulb from the socket and replace it with the new one. Avoid touching the glass part of the bulb with your bare hands, as it could shorten its lifespan. If you accidentally touch it, clean it with rubbing alcohol before installing.
Step 5: Insert the new bulb into the socket and twist it clockwise to secure it in place.
Step 6: Before reassembling everything, test the new bulb by pressing the brakes to ensure it lights up properly.
Step 7: If the bulb works fine, carefully put the housing cover back in place and secure it with the screws or clips.
Congratulations! You’ve successfully replaced the third brake light on your Toyota Avalon. Now you can drive with confidence, knowing that your vehicle’s safety is illuminated for all to see.
Remember, if you’re unsure or uncomfortable performing this task yourself, it’s always best to consult a professional mechanic. Safety should never be compromised, and they’ll be able to assist you with any car maintenance needs.
Shedding Light on Road Safety: A Guide to Toyota Avalon Third Brake Light Replacement
Are you tired of driving around with a malfunctioning third brake light on your Toyota Avalon? Not only is it a safety hazard, but it can also attract unwanted attention from law enforcement. Fortunately, replacing the third brake light on your Toyota Avalon is a relatively simple task that you can easily tackle yourself. In this guide, we will shed light on the process of Toyota Avalon third brake light replacement, ensuring your safety and peace of mind on the road.
First things first, you need to gather the necessary tools for the job. You’ll typically require a screwdriver, a socket wrench set, and a new third brake light assembly specifically designed for your Toyota Avalon model. Once you have these tools ready, you can proceed with the replacement process.
Start by locating the third brake light assembly on the rear deck of your Toyota Avalon. It’s usually positioned in the center, just below the rear windshield. Using the screwdriver or socket wrench, carefully remove the screws or bolts securing the assembly in place. Keep them safe, as you’ll need them later.
With the screws or bolts removed, gently pull out the old third brake light assembly from its housing. Disconnect any electrical connectors attached to it. Take a moment to inspect the wiring and connectors for any signs of damage or wear. If everything looks fine, you can move on to the next step.
Now, grab your new third brake light assembly and connect the electrical connectors to the appropriate ports. Ensure a secure connection to guarantee proper functionality. Slide the assembly into the housing, aligning it correctly. Then, reinsert the screws or bolts and tighten them until the assembly is securely fastened.

Once you’ve completed these steps, it’s time to test your newly installed third brake light. Turn on your vehicle’s ignition and engage the brakes. Verify that the light illuminates properly when you apply the brakes and turns off when they are released. If everything is working as expected, congratulations! You’ve successfully replaced the third brake light on your Toyota Avalon.
By following this guide, you can ensure road safety for yourself and others by maintaining a fully functional third brake light on your Toyota Avalon. Remember, it’s always essential to address any vehicle maintenance issues promptly to prevent accidents and stay on the right side of the law. Stay safe out there!
Upgrade Your Avalon’s Look and Functionality: DIY Replacement for the Third Brake Light
Looking to give your Avalon a fresh and stylish upgrade while enhancing its functionality? Well, look no further! In this article, we’ll delve into the world of DIY replacement for the third brake light, providing you with valuable insights on how to transform your Avalon’s look and elevate its safety features.
Why settle for a mundane factory-installed third brake light when you can customize it to suit your tastes? By replacing this crucial component yourself, you have the opportunity to add a touch of personalization and truly make your Avalon stand out on the road.
Now, you might be wondering, what exactly is a third brake light? Also known as a center high-mount stop lamp (CHMSL), it’s the additional brake light located at the center of your vehicle’s rear. Its purpose is to alert drivers behind you when you apply the brakes, ensuring enhanced visibility and reducing the risk of accidents.
The process of replacing the third brake light might sound intimidating, but fear not! It’s actually quite straightforward and doesn’t require any advanced technical skills. Begin by gathering the necessary tools, such as a screwdriver, pliers, and replacement bulbs or LED lights.

Start by carefully removing the cover of the existing third brake light assembly. This can usually be done by gently prying it open with a screwdriver or using pliers to unscrew any retaining clips. Once removed, disconnect the electrical connector that powers the brake light.
Next, insert the new brake light assembly, aligning it properly with the mounting holes. Secure it in place by reattaching the screws or clips. Make sure everything fits snugly and that the new brake light is properly secured.
Finally, connect the electrical connector to the new assembly and test the functionality of the brake light. Once you’re satisfied that everything is working correctly, replace the cover and admire your newly upgraded Avalon!
