Are you tired of driving around with a faulty brake light on your Mercedes CLC? Don’t worry, because replacing the third brake light is easier than you might think. In this article, we will guide you through the step-by-step process of replacing the 3rd brake light on your Mercedes CLC, ensuring that your vehicle remains safe and roadworthy.
The third brake light, also known as the center brake light or high-mounted stop lamp, plays a crucial role in alerting drivers behind you when you apply the brakes. A dysfunctional brake light not only compromises your safety on the road but may also result in unwanted attention from law enforcement. So let’s dive into the replacement process.
Firstly, you need to gather the necessary tools for the job. You’ll require a flathead screwdriver and a replacement bulb specifically designed for your Mercedes CLC model. Once you have these items ready, you can proceed to the next steps.
Start by opening the trunk of your vehicle. Look for the panel located directly behind the third brake light assembly. Carefully remove the panel using the flathead screwdriver, taking care not to damage it. Set the panel aside in a safe place.
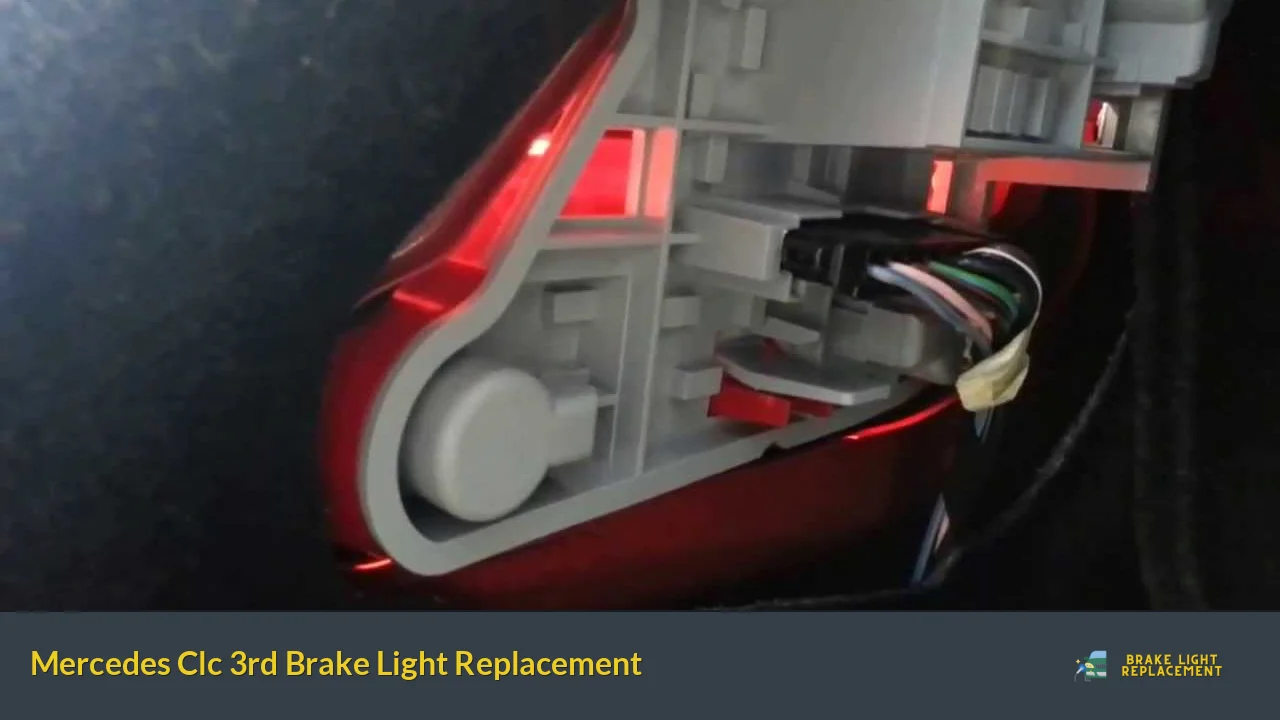
Next, locate the wiring harness connected to the back of the brake light assembly. Gently disconnect the harness by pressing the release tab and pulling it apart. This will allow you to remove the old brake light assembly completely.
Now, take your new replacement bulb and insert it into the empty socket. Ensure that it fits snugly and securely. Reconnect the wiring harness to the back of the new assembly and make sure it clicks into place.
With the new brake light securely in position, it’s time to test it before reassembling everything. Have someone assist you by pressing the brake pedal while you observe the newly installed light. If it illuminates correctly, you’re good to go!
Finally, carefully reinstall the panel you removed earlier, making sure it aligns properly. Give it a gentle push to lock it back into place. Step back and admire your handiwork – your Mercedes CLC now boasts a fully functional third brake light!
Revamp Your Ride: Step-by-Step Guide to Mercedes CLC 3rd Brake Light Replacement
Are you tired of driving around with a faulty brake light on your Mercedes CLC? Don’t let a malfunctioning brake light compromise your safety and style. In this step-by-step guide, we will walk you through the process of replacing the 3rd brake light on your Mercedes CLC, giving your ride a much-needed revamp.

Step 1: Gather the necessary tools
Before you begin the replacement process, gather the tools you’ll need. You’ll typically require a screwdriver (specific type may vary), a new 3rd brake light assembly compatible with your Mercedes CLC model, and possibly a trim removal tool.
Step 2: Remove the old brake light assembly
Start by locating the screws or bolts that secure the current brake light assembly in place. Carefully remove them using the appropriate screwdriver. Once the screws are removed, gently detach the assembly from the vehicle. Be cautious not to damage the surrounding parts or scratch the paint.
Step 3: Disconnect the wiring
After removing the old brake light assembly, locate the electrical connector that connects it to the vehicle’s wiring system. Carefully disconnect the wiring by firmly gripping the connector and pulling it apart. Take note of how the wires are connected for easier installation of the new brake light assembly.
Step 4: Install the new brake light assembly
Now it’s time to install the fresh brake light assembly. Begin by connecting the wiring of the new assembly to the vehicle’s wiring system. Ensure that the connections are secure and properly aligned. Once the wiring is connected, position the assembly in place and secure it with the screws or bolts you removed earlier. Double-check that everything is tightly fastened.
Step 5: Test the new brake light
With the installation complete, turn on your vehicle’s engine and check if the new brake light is functioning correctly. Step on the brakes and observe if the light illuminates as intended. If it does, congratulations! You have successfully replaced the 3rd brake light on your Mercedes CLC.
By following this step-by-step guide, you can easily revamp your ride by replacing the 3rd brake light on your Mercedes CLC. Remember to prioritize safety and take your time during the process. Now go ahead and enjoy a safer and more stylish driving experience in your revamped Mercedes CLC.
Illuminate the Road Ahead: How to Safely Replace the 3rd Brake Light on Your Mercedes CLC
Are you ready to illuminate the road ahead with confidence? It’s time to learn how to safely replace the 3rd brake light on your beloved Mercedes CLC. This simple yet crucial task can improve your visibility on the road and ensure the safety of yourself and others. So, let’s dive in and discover the steps to accomplish this task seamlessly.
Firstly, before getting started, gather all the necessary tools: a screwdriver, replacement bulbs, and a clean cloth. Once you’ve got everything ready, switch off the engine and take a deep breath. Safety always comes first! Open the trunk and locate the 3rd brake light assembly. You may need to remove some panels or covers to access it fully.
Using the screwdriver, carefully remove the screws that secure the brake light assembly in place. Keep them aside in a safe spot – you don’t want to lose them! Gently detach the old light from its position, ensuring not to damage any wires connected to it. Take a moment to inspect the wiring for any signs of wear or damage. If you notice any issues, it might be wise to consult a professional.
Now, it’s time to install the new brake light. Connect the wires to the appropriate terminals, making sure they are securely fitted. Place the new light into position and fasten it using the screws you removed earlier. Double-check that everything is snug and tight. You’re almost there!

With the new light securely in place, close the trunk and step back to admire your accomplishment. Your Mercedes CLC is now equipped with a shining beacon of safety. But remember, safety doesn’t end here. Regularly check your brake lights for optimal performance and replace any malfunctioning bulbs promptly.
Replacing the 3rd brake light on your Mercedes CLC is a straightforward task that can significantly enhance your safety on the road. By following these simple steps, you can ensure that your vehicle remains visible to others, helping prevent accidents and keeping everyone secure. Stay safe and enjoy the well-illuminated journey ahead!
Faulty Brake Light? Learn the Essential Tips for Swift Mercedes CLC 3rd Brake Light Replacement
Is your Mercedes CLC’s 3rd brake light giving you trouble? Don’t worry, because we’ve got you covered with some essential tips for swift and hassle-free brake light replacement. A faulty brake light not only compromises your safety but may also land you in legal trouble. By following these simple steps, you can easily replace the brake light on your Mercedes CLC and get back on the road with confidence.
Firstly, gather the necessary tools for the job. You’ll need a screwdriver, replacement bulbs, and possibly a socket wrench, depending on your specific model. It’s always a good idea to consult your vehicle’s manual for any additional instructions or precautions.
Next, locate the brake light assembly on your Mercedes CLC. In most cases, it can be found on the trunk lid or the rear deck. Carefully remove the screws or bolts securing the assembly using the appropriate tool. Keep them in a safe place to avoid misplacing them.
Once the assembly is loose, carefully disconnect the wiring harness from the back of the brake light. Take note of how the wires are connected, as you will need to replicate the same setup when installing the new brake light.
Now, remove the defective brake light bulb from its socket. Replace it with a new bulb of the same type and wattage. Make sure it is securely seated in the socket.
With the new bulb in place, reattach the wiring harness to the back of the brake light assembly. Double-check that all connections are secure before proceeding.
Finally, reposition the brake light assembly onto the trunk lid or rear deck. Tighten the screws or bolts to secure it in place. Give the brake light a gentle tap to ensure it is firmly attached.
That’s it! You have successfully replaced the faulty 3rd brake light on your Mercedes CLC. Remember to test the new brake light by pressing the brake pedal and verifying that it illuminates properly.
By following these essential tips, you can save time and money by replacing a faulty brake light on your Mercedes CLC yourself. However, if you are uncomfortable performing this task or encounter any difficulties, it’s always best to seek professional assistance to ensure the job is done correctly.
Upgrade Your Vehicle’s Safety: Expert Advice on Mercedes CLC 3rd Brake Light Replacement
Are you looking to enhance the safety features of your Mercedes CLC? One crucial component that plays a significant role in ensuring your safety on the road is the 3rd brake light. In this article, we will provide expert advice on how to replace the 3rd brake light in your Mercedes CLC, helping you upgrade your vehicle’s safety to the next level.
When it comes to replacing the 3rd brake light, it’s important to have a clear understanding of the process. First, locate the existing 3rd brake light on the rear of your vehicle. It is typically positioned at the top center of the rear windshield or on the trunk lid. Once you’ve identified its location, you can proceed with the replacement.

To remove the old 3rd brake light, you may need to access it from inside the vehicle or from the outside, depending on the model. Some lights can be accessed by removing the interior trim panel, while others require accessing it from the outside by removing screws or clips. Follow the manufacturer’s instructions or consult a professional if you’re unsure about the removal process.
After removing the old brake light, it’s time to install the new one. Ensure that the replacement light is compatible with your Mercedes CLC model. Carefully connect the wiring harness to the new light, making sure all connections are secure. Then, position the new light in place and fix it using the appropriate fasteners or clips.
Once you have successfully installed the new 3rd brake light, give it a test to ensure it’s functioning properly. Press the brake pedal and verify that the light illuminates as intended. If everything works correctly, you have successfully upgraded your vehicle’s safety by replacing the 3rd brake light.
Remember, if you’re not confident in performing this task yourself, it’s always recommended to seek the assistance of a professional mechanic or technician. They have the expertise and experience to handle the replacement with precision, ensuring your vehicle’s safety is not compromised.
By following these expert tips on Mercedes CLC 3rd brake light replacement, you can enhance your vehicle’s safety and have peace of mind while driving. Don’t underestimate the importance of a properly functioning brake light – it could make a significant difference in preventing accidents and ensuring your safety on the road.