Replacing the brakes on your RV is a crucial maintenance task that ensures safety and performance on the road. Over time, brake components wear out due to friction and heat, making it essential to replace them regularly. This guide provides a comprehensive overview of how to replace RV brakes, including the necessary tools, step-by-step instructions, and important tips for a successful replacement.
Step Description 1 Gather Tools and Materials 2 Lift and Secure the RV 3 Remove Wheels 4 Access Brake Components 5 Inspect Old Brake Parts 6 Replace Brake Components 7 Reassemble and Adjust Brakes 8 Test New Brakes
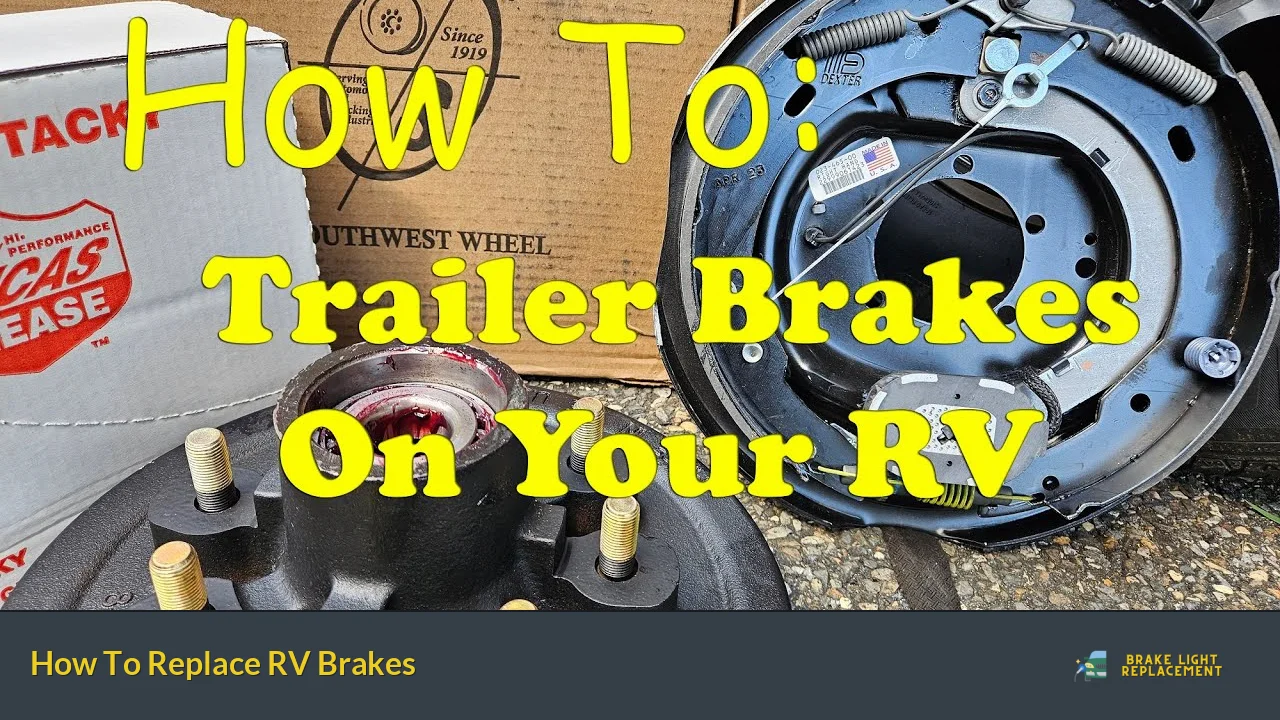
Gather Tools and Materials
Before starting the brake replacement process, it’s essential to gather all necessary tools and materials. This preparation will make the process smoother and more efficient. Here’s a list of what you’ll need:
- Jack: A reliable hydraulic or floor jack to lift the RV.
- Jack Stands: To securely hold the RV in place once lifted.
- Lug Wrench: For removing lug nuts from the wheels.
- Brake Kit: Includes new brake shoes or pads, drums or rotors, springs, and any necessary hardware.
- Wire Cutters/Strippers: For disconnecting electrical connections if applicable.
- Grease: High-quality bearing grease for reassembly.
- Cleaning Supplies: Brake cleaner and rags for cleaning components.
Having these items ready before you begin will save you time and frustration during the replacement process.
Lift and Secure the RV
Safety is paramount when working on your RV. Start by parking it on a level surface and engaging the parking brake. Use your jack to lift one side of the RV until the wheels are off the ground. Once elevated, place jack stands under the frame to secure it. Ensure that everything is stable before proceeding; this is an important safety measure that prevents accidents while you work.
Remove Wheels
With the RV securely lifted, it’s time to remove the wheels. Use your lug wrench to loosen and remove the lug nuts from each wheel. After removing them, carefully pull off the wheels and set them aside in a safe location. Keep track of all lug nuts to ensure none are lost during this process.
Access Brake Components
Now that you have removed the wheels, you need to access the brake components. Depending on your RV’s design, you may need to remove hubcaps or retaining clips that cover the brake drum or disc assembly. Carefully take off any components blocking access to the brakes.
Once everything is clear, gently pull off the brake drum or rotor to expose the internal brake assembly. This step allows you to inspect all components for wear or damage.
Inspect Old Brake Parts
Before replacing any parts, inspect your old brake components thoroughly. Look for signs of wear such as:
- Deep grooves or scoring on brake drums or rotors
- Cracked or worn brake shoes/pads
- Damaged springs or hardware
This inspection is critical as it helps determine whether you need to replace just certain parts or if a full replacement of all components is necessary. If any parts show significant wear, they must be replaced to ensure optimal braking performance.
Replace Brake Components
Once you’ve assessed which parts need replacing, it’s time to install new components. Start by removing old brake shoes or pads along with any springs or hardware that are worn out. Compare these with your new parts to ensure they match correctly.
Install new brake shoes or pads by positioning them in place according to your RV’s specifications. Make sure all springs are connected properly and that everything is secured tightly. If you’re replacing drums or rotors, slide them onto their respective assemblies carefully.
Reassemble and Adjust Brakes
After installing new components, it’s time to reassemble everything. Reattach any drums or rotors you removed earlier, ensuring they fit snugly against their respective assemblies.
Next, adjust the brakes according to manufacturer specifications. For drum brakes, this typically involves adjusting tension so that shoes are close but not dragging against the drum. Proper adjustment is crucial for effective braking performance.
Test New Brakes
With everything reassembled, it’s essential to test your new brakes before hitting the road. Lower your RV back down from its elevated position and reinstall the wheels securely using your lug wrench.
Once everything is back in place, take your RV for a short test drive in a safe area at low speeds. Gradually apply the brakes several times to ensure they function correctly and smoothly without any unusual noises or resistance.
If everything feels right during testing, then you’ve successfully replaced your RV brakes!
FAQs About How To Replace RV Brakes
- How often should I replace my RV brakes?
You should generally replace RV brakes every three to five years or after significant mileage. - What tools do I need for replacing RV brakes?
You will need a jack, jack stands, lug wrench, wire cutters/strippers, grease, and a brake kit. - Can I replace my RV brakes myself?
Yes, if you have basic mechanical skills and tools, replacing RV brakes can be a DIY project. - What should I do if my new brakes feel spongy?
If your new brakes feel spongy, check for air in the brake lines or improper installation. - Is it necessary to test my new brakes after replacement?
Yes, testing ensures that they are functioning correctly before taking your RV on the road.
Regular maintenance of your RV’s braking system is crucial for safe travels. By following these steps carefully and ensuring proper installation of new components, you can maintain optimal braking performance for years to come.