Are you tired of dealing with a faulty brake light on your 2013 Ford Escape? Don’t worry, because we’ve got you covered! In this article, we will guide you through the process of replacing your brake light, giving you peace of mind and ensuring the safety of yourself and others on the road.
Why is it important to have a functioning brake light? Well, imagine driving without being able to signal other drivers when you’re braking. It’s like going into battle without a weapon – dangerous and unpredictable. That’s why maintaining your brake lights is crucial for road safety.
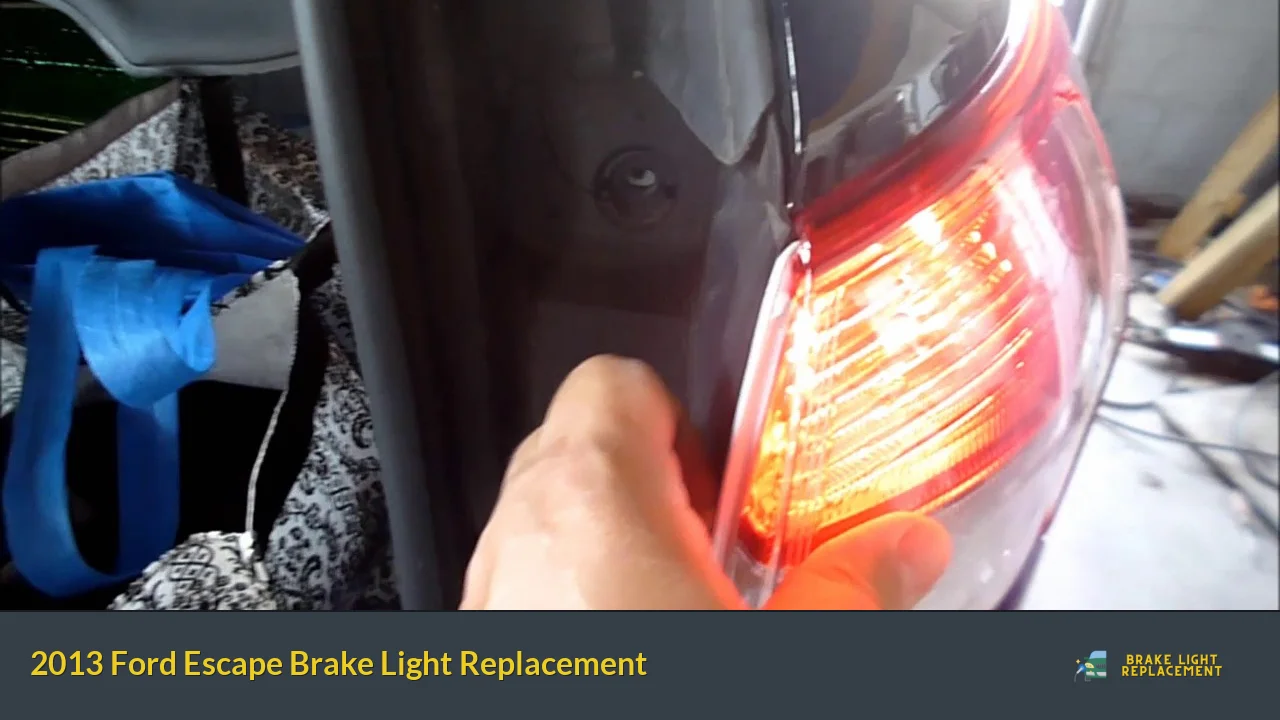
Now, let’s get down to business. Replacing the brake light on your 2013 Ford Escape is easier than you might think. Start by locating the rear of your vehicle where the brake light assembly is situated. You’ll notice a small panel that can be easily removed with a screwdriver or a trim removal tool. Gently pry it open and set it aside.
Once the panel is off, you’ll be able to see the bulb socket connected to the brake light assembly. Give it a counterclockwise twist to unlock it from the assembly. Carefully remove the old bulb and replace it with a new one of the same size and type. Remember, choosing the correct bulb is essential to ensure compatibility and proper functionality.
With the new bulb in place, give it a clockwise twist to secure it. Now, reattach the panel by aligning the clips and pressing it firmly until it clicks into place. Take a moment to test your new brake light by pressing the brake pedal and observing if it illuminates properly.
Congratulations! You’ve successfully replaced the brake light on your 2013 Ford Escape. Enjoy the peace of mind knowing that your vehicle is equipped with a fully functional brake light, keeping you and others safe on the road.
Remember, regular maintenance and prompt replacement of faulty components are key to ensuring the longevity and reliability of your vehicle. So, the next time you encounter an issue with your car, don’t hesitate to take action and give it the attention it deserves. Safe travels!
Revamp Your Ride: Step-by-Step Guide to 2013 Ford Escape Brake Light Replacement
Are you tired of your 2013 Ford Escape’s dull and worn-out brake lights? Do you want to revamp your ride and give it a fresh look? Well, you’re in luck! In this step-by-step guide, we’ll walk you through the process of replacing the brake lights on your trusty Ford Escape.
First things first, let’s gather the tools you’ll need for this project. You’ll require a screwdriver, replacement bulbs (make sure they’re compatible with your vehicle’s specifications), and a clean cloth to handle the bulbs without getting any dirt or oil on them.
With the tools ready, let’s move on to the next step. Locate the brake light assembly on your Ford Escape. It’s typically located on the rear of the vehicle and can be accessed from inside the trunk. Open the trunk and remove any covers or panels that may be obstructing your access to the brake light assembly.

Once you have a clear view of the assembly, you’ll notice a few screws holding it in place. Grab your screwdriver and start removing these screws carefully. Keep track of them so you won’t lose them during the process.
After removing the screws, gently pull out the brake light assembly. You may need to apply some force, but be cautious not to damage any wiring connected to it. Once the assembly is detached, locate the specific bulb that needs replacement. Twist it counterclockwise to remove it from the socket.

Now it’s time to insert the new bulb. Take one of the replacement bulbs you prepared earlier and align the pins with the slots in the socket. Give it a gentle twist clockwise to secure it in place.
With the new bulb in position, it’s time to reattach the brake light assembly. Carefully slide it back into its original position and secure it with the screws you removed earlier. Make sure it fits snugly and doesn’t wobble.
Finally, give your brake lights a test by pressing the brakes or having someone observe them while you do. If everything looks good and functions properly, congratulations! You’ve successfully revamped your ride with brand new brake lights.
Remember, it’s crucial to prioritize your safety while working on any vehicle maintenance tasks. Take your time, follow the instructions diligently, and if you’re unsure about anything, consult a professional mechanic for assistance.
Now that you know how to replace the brake lights on your 2013 Ford Escape, go ahead and give your ride a fresh and stylish look that will turn heads wherever you go!
Brighten Up Your Drive: How to Replace Brake Lights on Your 2013 Ford Escape
Are you tired of driving around with dim or non-functioning brake lights on your 2013 Ford Escape? Don’t worry, replacing them is easier than you might think. In this article, we’ll guide you through the simple steps to brighten up your drive by replacing the brake lights on your vehicle.
First things first, let’s gather the necessary tools for the job. You’ll need a replacement bulb that matches the specifications for your 2013 Ford Escape. Consult your owner’s manual or visit an auto parts store to find the correct bulb type. Additionally, have a screwdriver and a clean cloth handy.
Once you have everything ready, start by opening the rear hatch of your Ford Escape. Locate the access panel on the inside of the hatch directly behind the brake light assembly. Gently pry off the panel using a screwdriver or your fingers. Be careful not to apply too much force to avoid damaging the panel.
Now, you should be able to see the wiring connectors and the mounting screws that hold the brake light assembly in place. Carefully disconnect the wiring connector by pressing the release tab and pulling it apart. Set the old brake light assembly aside and use the clean cloth to wipe away any dirt or debris from the area.
Next, take your new brake light assembly and align it with the mounting holes. Secure it in place by tightening the mounting screws firmly but not excessively. Once the assembly is securely fastened, reconnect the wiring connector by pushing it back together until you hear a click.
Before putting everything back together, it’s important to test the new brake lights. Have someone step on the brake pedal while you observe the lights to ensure they are working properly. If all is well, replace the access panel by snapping it back into position.
Congratulations! You’ve successfully replaced the brake lights on your 2013 Ford Escape. Now you can enjoy a safer and brighter drive. Remember, it’s essential to regularly check and maintain your vehicle’s lights for optimal visibility on the road.
Don’t let dim or non-functioning brake lights compromise your safety. By following these simple steps, you can easily replace the brake lights on your 2013 Ford Escape and brighten up your drive. Stay vigilant and take care of your vehicle’s lighting system to ensure a secure and enjoyable driving experience.
Ensuring Road Safety: Expert Tips for DIY 2013 Ford Escape Brake Light Replacement
Introduction:
Are you a proud owner of a 2013 Ford Escape? Keeping your vehicle in top-notch condition not only enhances its performance but also ensures road safety. One crucial aspect that deserves attention is the brake lights. Properly functioning brake lights are essential for alerting other drivers on the road when you apply the brakes. In this article, we will provide you with expert tips and guidance for safely replacing your 2013 Ford Escape brake lights on your own.
Why Brake Light Replacement Matters:
Imagine driving without brake lights—it would be like communicating without words. Brake lights serve as a vital communication tool between drivers, enabling them to predict and react to your actions on the road. By replacing faulty brake lights promptly, you contribute to road safety by minimizing the risk of rear-end collisions and providing clear signals to other motorists.
DIY Brake Light Replacement:
Replacing a brake light on your 2013 Ford Escape can be a simple task if done correctly. Here are some expert tips to guide you through the process:
-
Gather the necessary tools: Before starting the replacement, ensure you have the required tools such as a screwdriver, pliers, gloves, and a replacement bulb compatible with your vehicle’s make and model.
-
Locate the brake light assembly: Depending on your vehicle’s design, the brake lights could be accessed from inside the trunk or behind the housing on the exterior. Refer to your owner’s manual for specific instructions.

Remove the old bulb: Carefully detach the wiring harness connected to the bulb and remove the old bulb from its socket. Avoid touching the new bulb with your bare hands to prevent oil residue affecting its lifespan.
-
Install the new bulb: Insert the new bulb into the socket and secure it properly. Reattach the wiring harness ensuring a firm connection.
-
Test the brake lights: Before completing the replacement, test the newly installed brake lights to ensure they function correctly. Ask someone to observe as you apply the brakes to verify their proper operation.
By following these expert tips, you can confidently replace your 2013 Ford Escape’s brake lights and contribute to road safety.
Conclusion:
No More Dim Lights: Discover the Best Methods for Replacing Brake Lights on Your 2013 Ford Escape
Tired of dim lights hindering your driving experience? Fret no more! In this article, we will delve into the best methods for replacing brake lights on your trusty 2013 Ford Escape. By following these simple steps, you’ll have bright and fully functional brake lights in no time!
First things first, let’s talk about safety. Before getting your hands dirty, ensure that your vehicle is parked on a level surface and the engine is turned off. Additionally, put on some gloves to protect your hands from any potential glass breakage.
To access the brake lights, you’ll need to open the trunk. Look for the interior trim panel located at the back of the trunk. Carefully remove it by loosening the screws or clips, depending on the model of your Ford Escape. Gently set the panel aside, making sure not to damage it.
Now that you have a clear view of the rear light assembly, locate the burnt-out brake light bulb. Typically, there are three bulbs housed within the assembly: the brake light, the tail light, and the turn signal. Identify the specific brake light bulb that needs replacement.
To remove the old bulb, twist it counterclockwise. It should easily detach from the socket. Take note of the bulb’s type (usually indicated on its base) to ensure you purchase the correct replacement.
Next, grab your new brake light bulb and insert it into the socket. Give it a gentle clockwise twist to secure it in place. Make sure it is snugly fitted; this will ensure proper functioning.
With the new bulb in position, take a moment to test it before proceeding. Have someone press the brake pedal while you observe the lights from the rear of the vehicle. If the new bulb illuminates brightly, congratulations—you’ve successfully replaced your brake light!
Finally, reattach the interior trim panel in the trunk by reversing the removal process. Tighten the screws or clips to secure it firmly. Take a moment to admire your handiwork, knowing that you’ve improved your safety on the road.
Replacing brake lights on your 2013 Ford Escape is a straightforward process. By following these steps with care and attention, you’ll ensure that your brake lights shine brightly, enhancing both your visibility and the safety of those around you. Don’t let dim lights dampen your driving experience—take action and enjoy the clear brilliance of new brake lights today!